 TikTok accounts
 Orders & performance
 Team management
 Profit & cost
 Brand deals
 Creator toolbox
 Solo creators
 Creator teams
 Multi-department companies
Who is this for?
- Business leads and agency owners registering batches of accounts their organization legitimately controls and want to import handles, passwords, and 2FA keys without typing them field by field
- Agency managers who want passwords, 2FA keys, and login emails stored encrypted with a full view log
- Team leads who track how much each onboarding batch cost and want costs linked automatically to "Account payback"
What to prepare before starting?
- Have the account text for onboarding ready (including handle or login email/phone, password, and optional 2FA key, email, email password, or UID)
- Know the unit recorded cost (in CNY), onboarding date, and account source for this batch so Star Captain can track batch ROI accurately
01Open "Accounts → Inventory" and click "Bulk import"
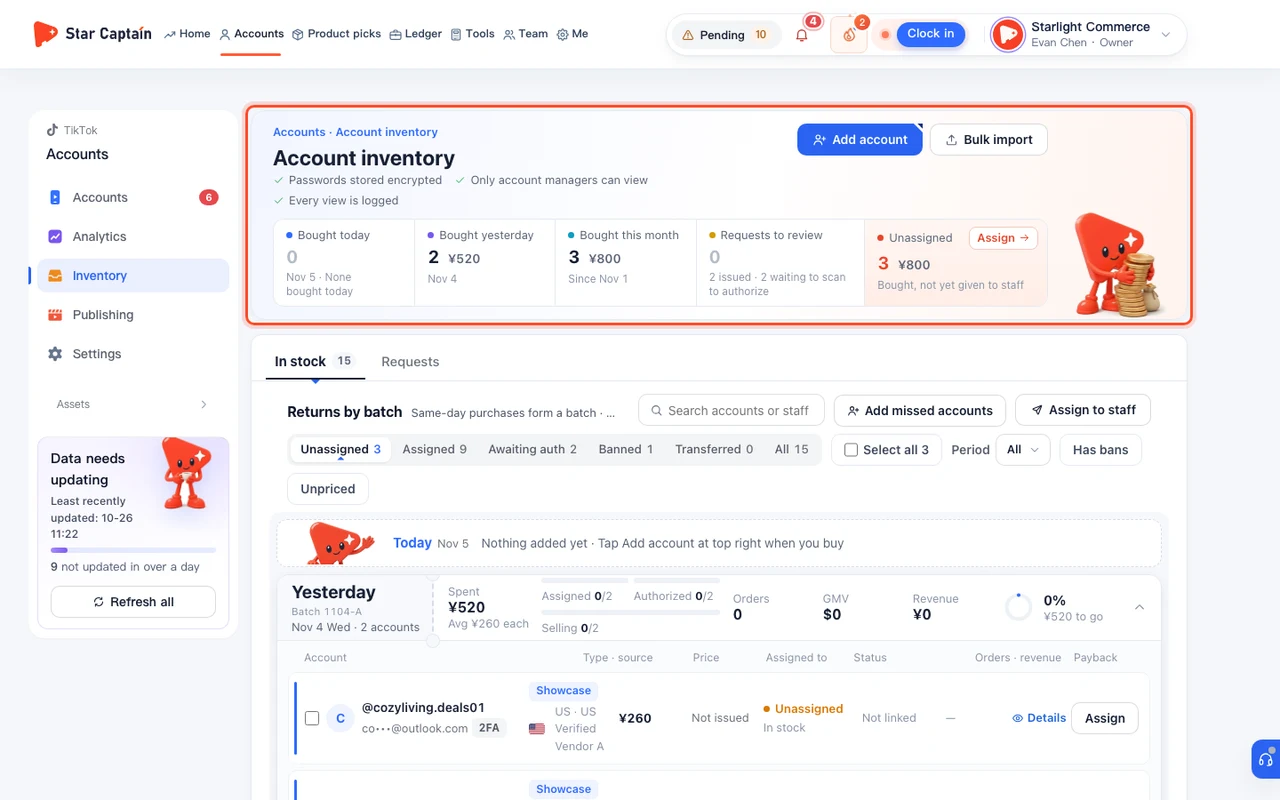
To bulk import accounts to inventory, sign in to the workspace and click "Accounts → Inventory" in the left navigation. The header strip summarizes "Added today", "Added yesterday", "Added this month", "Requests to review", and "Unassigned" (under the "In stock" tab), while the security bar confirms "Passwords stored encrypted", "Only account managers can view", and "Every view is logged". To add a single account, click "Add account"; to bring in a batch, click "Bulk import" at the top right to open the "Add new accounts" modal.
02Paste account details in "1 · Paste the account details" to parse handles, passwords, 2FA keys, and emails
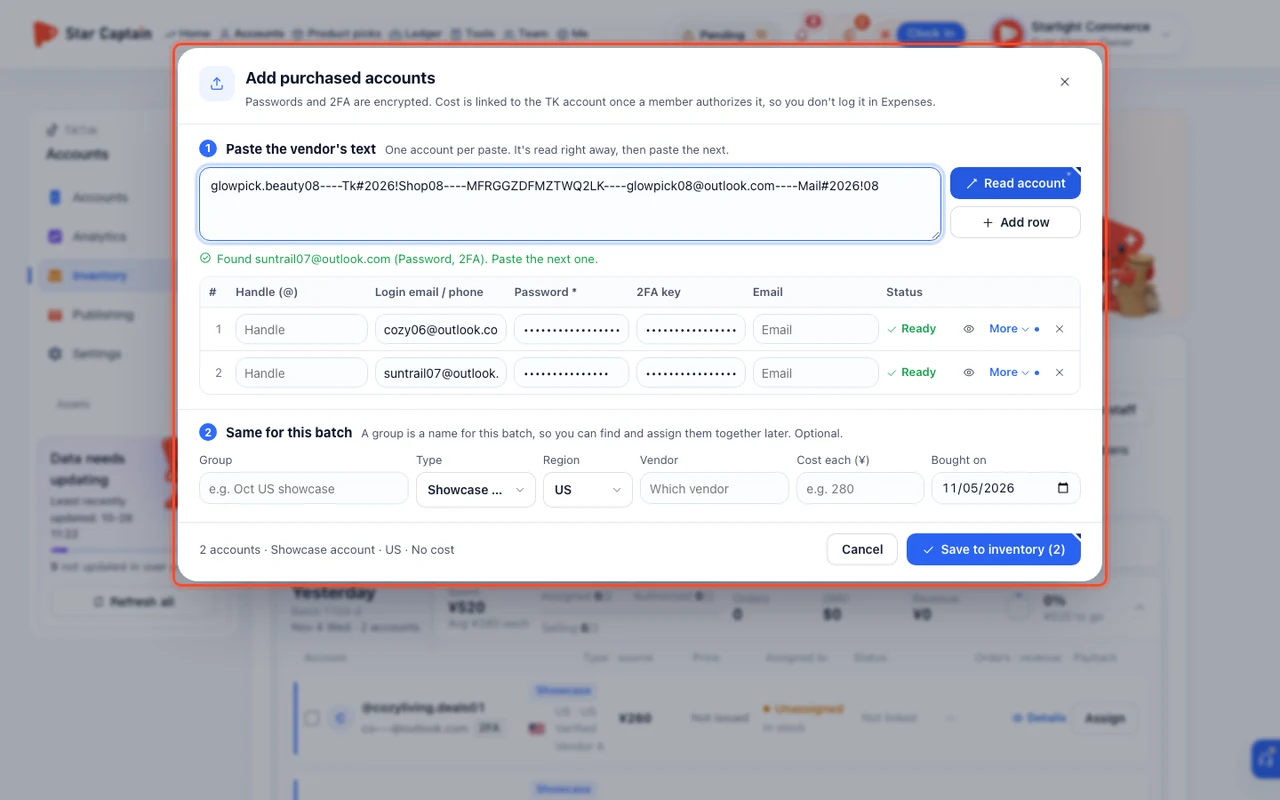
In step "1 · Paste the account details", paste the block of text for an account (labeled lines like `Account: / Password: / 2FA: / Email:` or `account----password` formats both work). Each paste is parsed right away and added as a row in the "Accounts to save" table, showing `Found @xxx (Password, 2FA, Email). Paste the next one.` Keep pasting the remaining accounts one after another, or click "Add row" to type directly in the table. Each row fills in "Handle (@)", "Login email / phone", "Password *", "2FA key", and "Email"; click "More" on any row to expand "UID", "Email password", and "Notes". Click the eye icon ("Show this row's password and key") to inspect masked secrets, and check that the "Status" column shows "Ready".
03Fill in shared batch details under "2 · Same for this batch" and click "Save to inventory"
Move to step "2 · Same for this batch" to apply shared attributes across all rows at once: enter a "Group" name (for example, `Oct US showcase`, or click one of the "Existing groups" chips below), pick the "Type" (such as "Showcase account" or "Live account") and "Region" (`US`, `MX`, `BR`, `UK`), enter the "Account source" ("Which source"), and fill in "Cost each (CNY)" (for example, `280`) and "Added on". Review the summary line at the bottom left and click "Save to inventory (N)" (up to 50 accounts per batch).
04Select accounts under "Unassigned" and click "Assign to staff" to hand them to operators
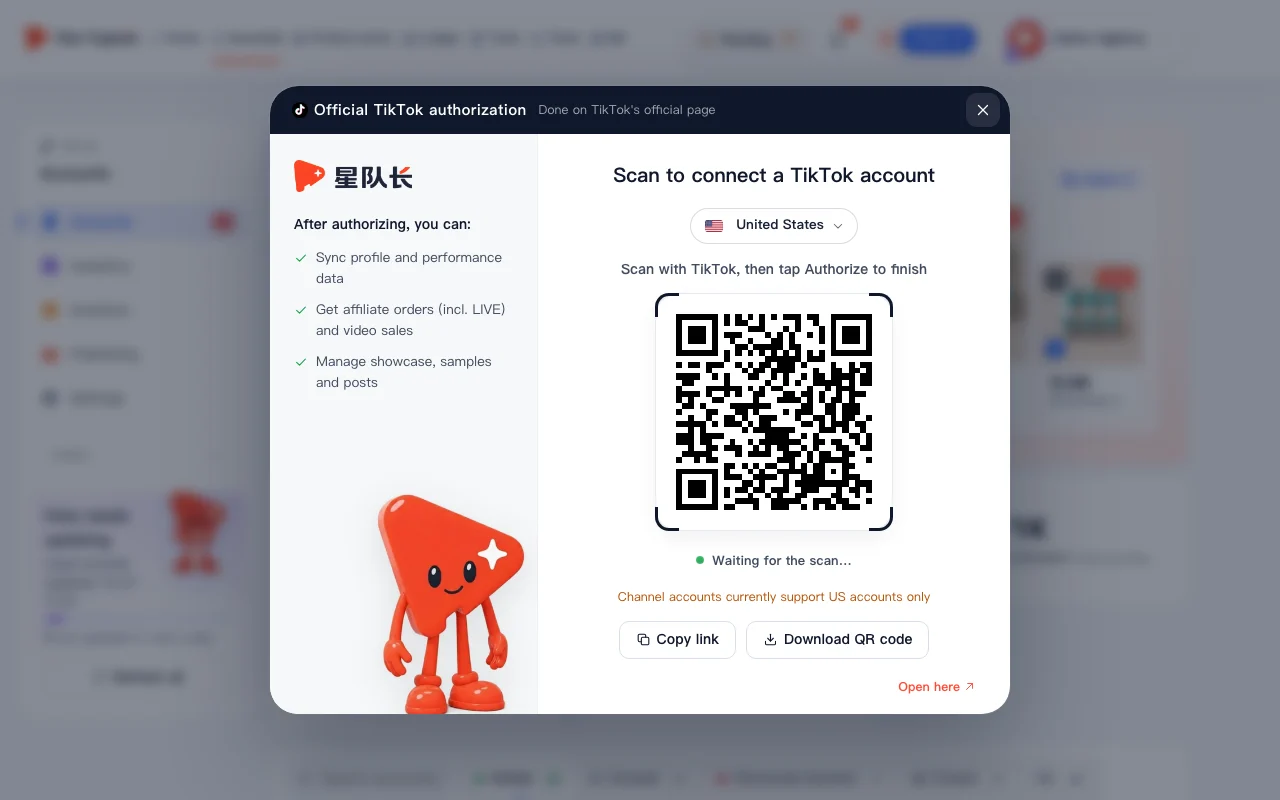
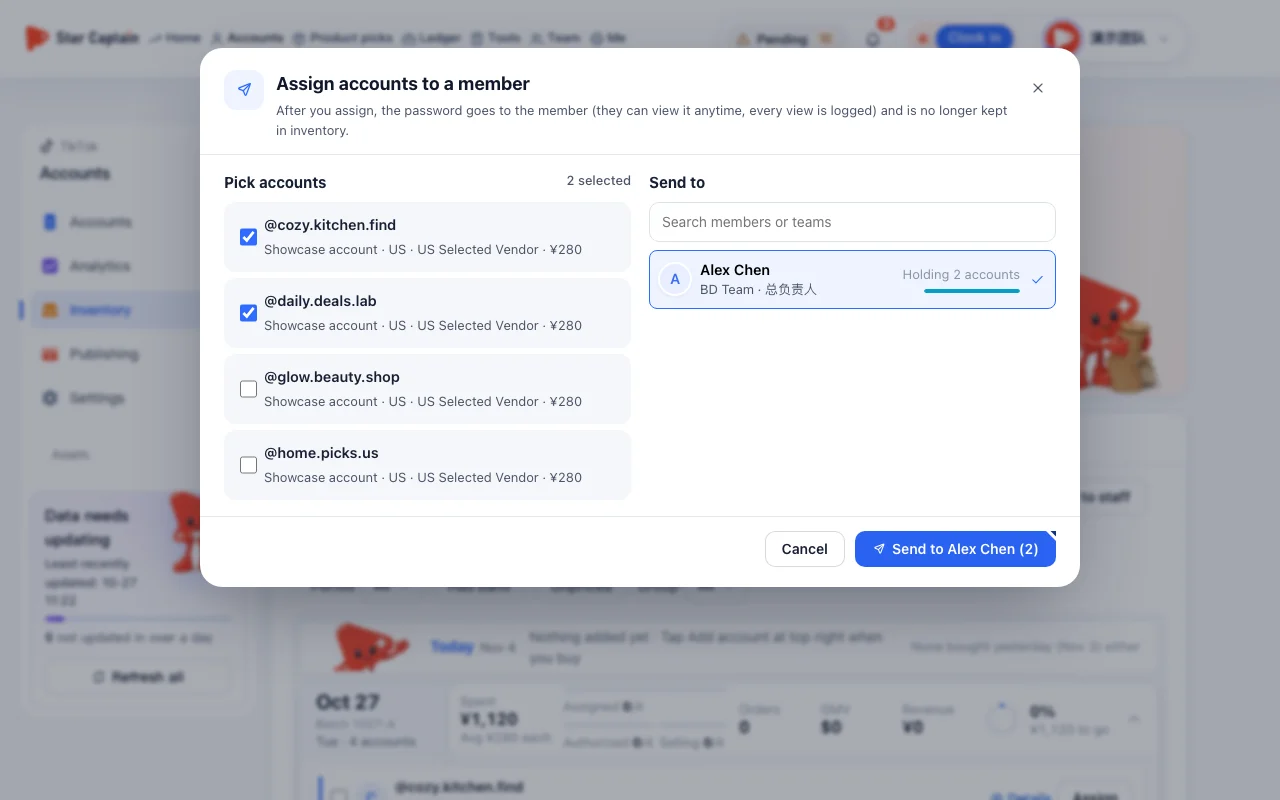
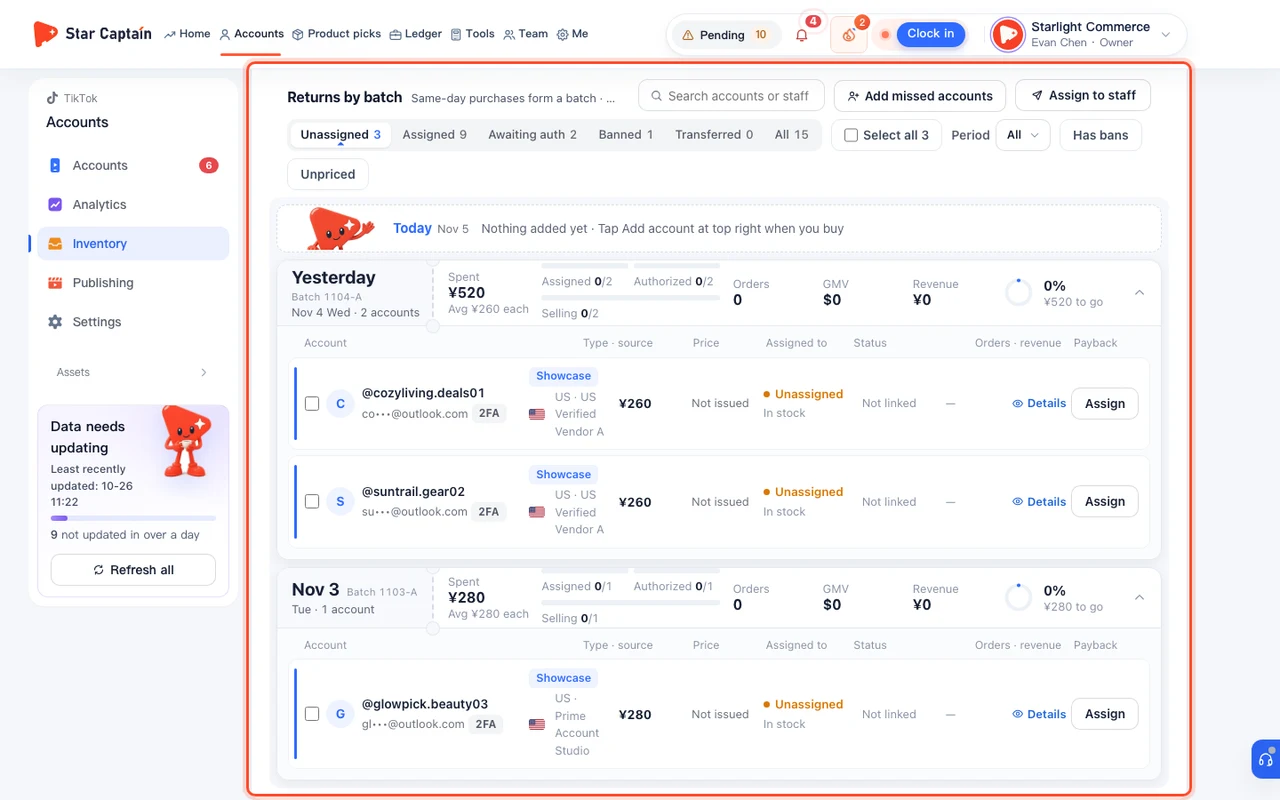
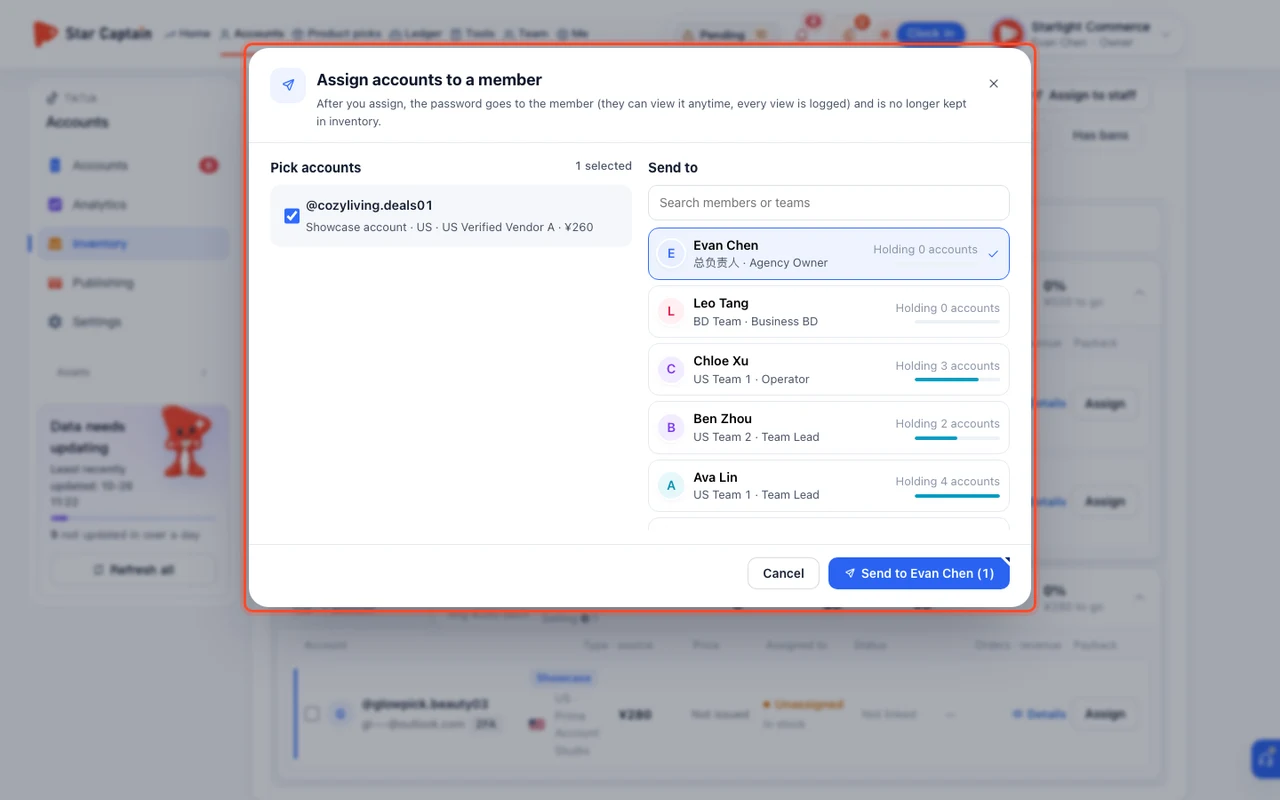
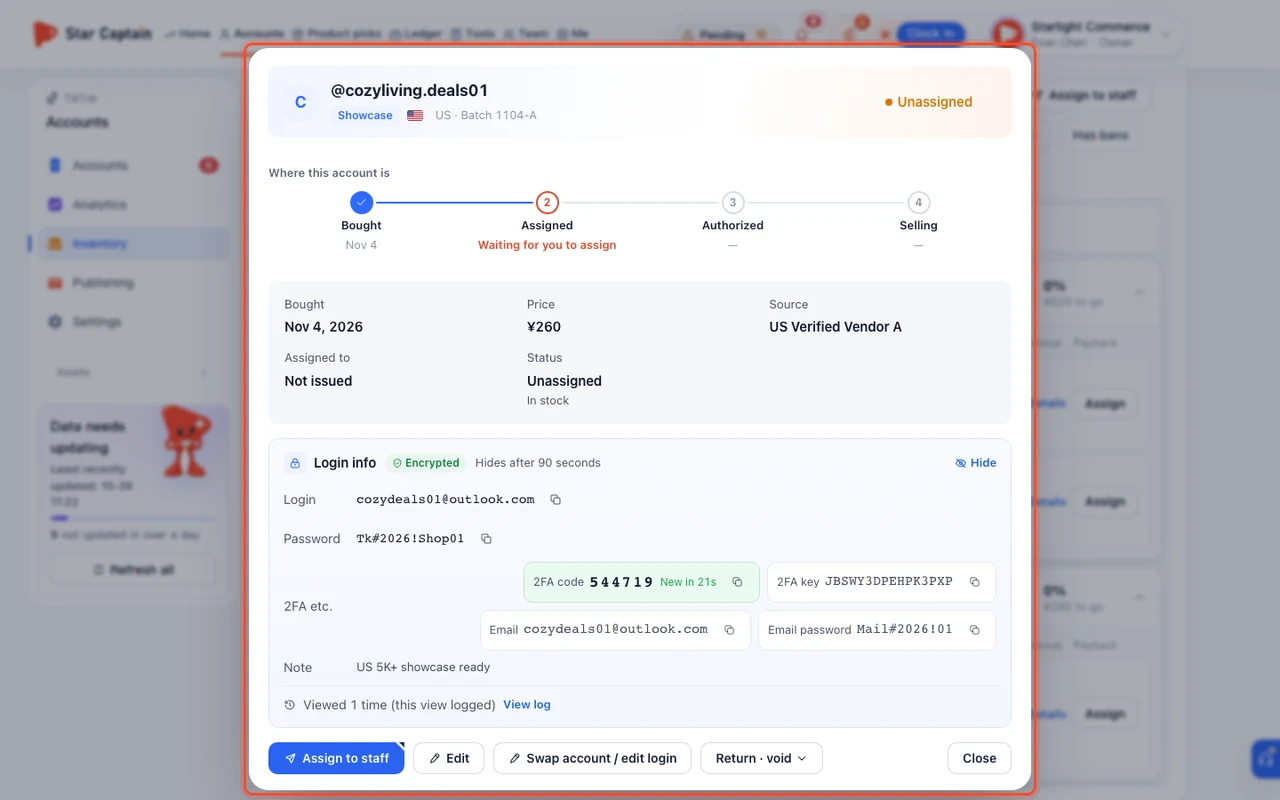
Saved accounts appear under "In stock", grouped into batches by onboarding date ("Same-day entries form a batch"). Switch to the "Unassigned" tab (or click "Assign" inside the "In stock" top card), check the accounts you want to distribute, and click "Assign to staff". In the "Assign accounts to a member" modal, select the recipient under "Send to" and confirm. The employee can then open "Me → My accounts", find the accounts under "Accounts received", and click "View login details (password · 2FA · email · notes)" to copy the password and the live 6-digit "2FA code" (refreshed every 30 seconds), sign in to TikTok, and scan to authorize.
05Backfill older authorized accounts with "Add missed accounts"
If your team previously connected TikTok accounts directly on the "Accounts" page without recording them in "Account inventory" first, click "Add missed accounts" on the right side of the inventory toolbar. In the modal, select the account under "Accounts not via inventory" (or search by handle), fill in "Onboarding date", "Price (CNY)", and "Account source" ("Source / source, optional"), and click "Add to inventory".
Screenshots use demo data. Check the product for what you actually see.
FAQ
After entering "Cost each (CNY)" here, do I also need to log an expense in "Ledger → Expenses"?
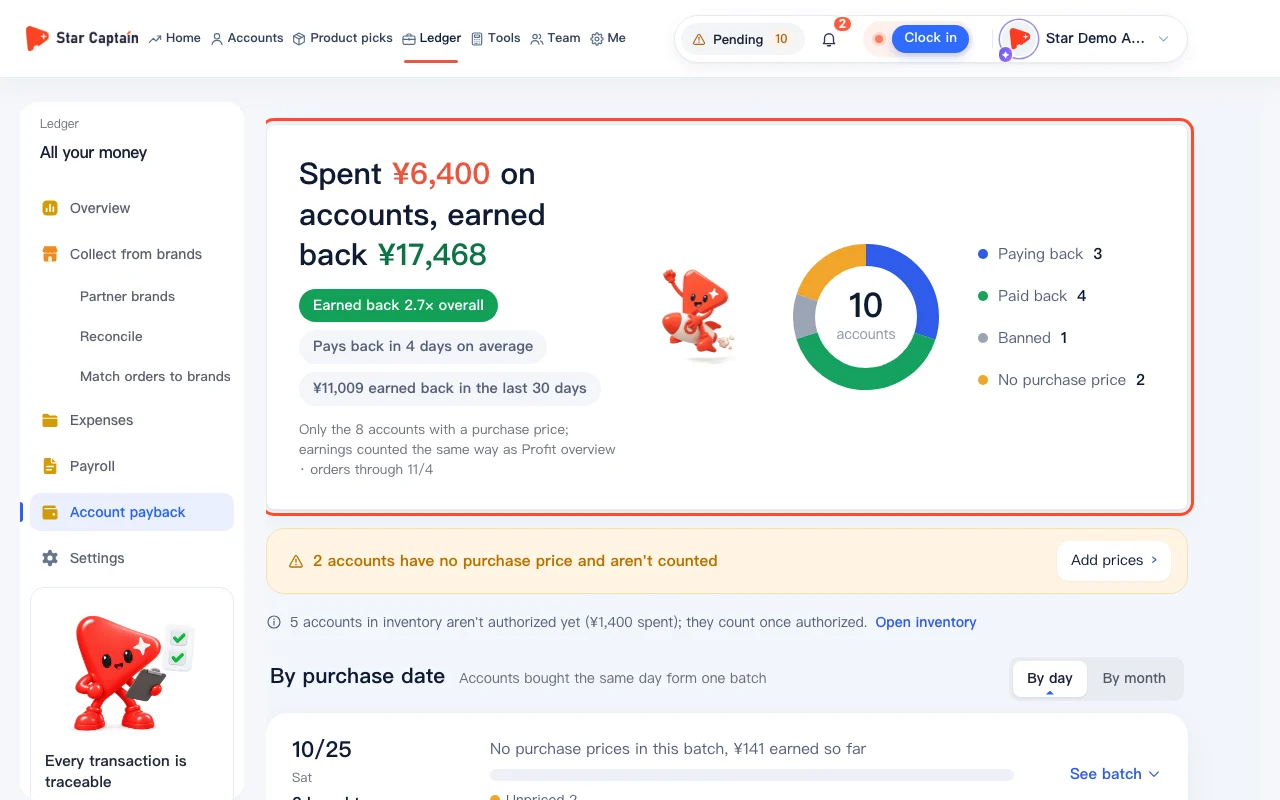
No. Once a team member authorizes the account in Star Captain, the recorded cost you entered in "Account inventory" links to that TikTok account automatically and flows into "Ledger → Overview" and "Account payback" without double counting.
Does my operator need an external authenticator app to use the 2FA key?
No. When you save the secret string in the "2FA key" column, Star Captain generates the live 6-digit "2FA code" right next to the password and refreshes it every 30 seconds, so staff can copy it in one click.
Can I see who viewed an account's password after it is imported or assigned?
Yes. Passwords and 2FA keys are stored encrypted, and every time an owner, business lead, or assigned operator views them, Star Captain records the viewer and timestamp in the "View log" inside the account's details.
What if I need to register more than 50 accounts in a single day?
Each "Bulk import" submission saves up to 50 accounts at a time. Save the first 50, then click "Bulk import" again for the rest—as long as they share the same "Added on" date, they will roll up into the same daily batch automatically.